New to the ideas of S.T.E.A.M.? Not sure about how social media fits in your classroom? Or are you just looking to read ideas from a fellow teacher? If you answered yes to any of these questions. Look around and check out this blog.
This week all of my free time has been spent on creating posters for my different centers, along with doing research. Here is a picture of the posters that are in progress with some help from my fifth graders.
Some great resources I have found so far have been:
I haven't gotten the opportunity to use some of these techniques yet. I am hoping to start on Monday. I will let you know how it goes. If you have any suggestions or ideas, I'd love to here them. Comment on here or tweet me @STEAMJames.
You can use the QR Scanner in your Twitter app to add me here:
What do you think when you hear the word "ebook"? Before class last week, I thought of ebooks as an alternate to paper textbooks and novels, a compilation of words to share knowledge that is written by an accredited author. I had never thought about turning my students into authors of their own ebooks.
There are advantages and disadvantages to student-created ebooks. An advantage is the ability to continuously edit the writing. One of the steps of the writing process is to edit and revise. When writing an ebook the book is never permanently finished. For new writers this is great because as they learn about new techniques and ideas, they can go back into their ebook and improve it. This is also a good example of the improve step of the engineering design process.
A disadvantage of using ebooks to practice the writing process is that spellcheck and grammar check can prevent the student from actually knowing the proper use or spellings of words. As a teacher it is important that we stress not to rely on the spellchecker, because it isn't always correct.
A great example of a teacher who uses ebooks in his classroom is Jon Smith. He is an ibook ambassador, you can find his students' books at this website: http://mrsmithtrt.weebly.com/class-ebooks.html. I really enjoyed his collaboration books. He includes different grade levels to create books. The book, "Monsterpieces" had 3rd grade students draw the monsters and high school monsters remastered them to create the "monsterpieces". I really like this younger student to older student collaboration. It has inspired me to want to start creating ebooks in my STEAM classes. I didn't think it would be easily done until I saw some of his examples. I love the idea of having my 5th grade students write a story and finishing the story with kindergarten illustrations.
I think using ebooks in the classroom will increase engagement. Jon Smith has said that it has made students more excited about writing too. I like the idea that students will open their audience to beyond their small social circle. When students think about getting their work out there for anyone, they tend to have better quality work. I have noticed this when I tell them that I will be putting some of their artwork on my blog.
Have you used ebooks in your classroom already? Do you have ideas for them in the future? Let me know by commenting below.
Hello and welcome to my TAB classroom journey. The next couple of weeks you will get to experience my classroom's transformation. I will try my best to share my experiences and ideas as I go along. I hope you enjoy and maybe even find some inspiration to try something new, too! If you do, I would love to hear about it! Please leave a comment below or contact me through one of my various social media sources.
Introduction:
In order for me to properly take you on the journey with me, you need to know how and why I have decided to go towards the TAB classroom idea. So let's start at the beginning. In my district we have the opportunity to turn two of our professional development days into "trade days". A trade day is just what it sounds like, we get to trade a typical professional development day into a day off if we complete a class with other teachers throughout a three month period. For my April trade day, I joined the art teachers in our district to go over the Art of Ed's Winter Conference. While choosing our conference sessions, I came across one called "Infusing STEAM concepts into a TAB Classroom" by Kelly Phillips. Since my education license and background is not actually in art, I had no idea what a TAB classroom was. It was originally the STEAM acronym that caught my eye. So I asked the seasoned art teachers what it meant. The high school teacher, Sara, explained to me that it stood for teaching artistic behaviors or choice-based-curriculum. This idea intrigued me so I decided to research it on my own. I found a lot of information from the website, TAB Teaching for Artistic Behavior. Here is what I discovered:
If you use anything from lessons, to books, to worksheets for your classroom, you have probably heard the word "copyright". Even though you have heard it, do you actually know what it means? I thought I knew what copyright meant, but now that I have dug into the concept further, I have realized I haven't really understood it. I had always thought copyright was a legal document that you had to apply to get. I have been confusing copyright with getting a patent, though similar they are not the same. Before learning more about copyrights, I didn't realize that anything a person creates and shares, comes with an automatic copyright attached. Like I mentioned above, I always thought it was something you had to buy and get legalized. I am relieved to know that all of the items I post online actually is protected by a copyright.
Since sharing is a large part of teaching, I think creative commons is another vital part of the copyright process. I wasn't very familiar with creative commons when I first began this assignment. Through watching various informational videos and reading articles on the matter, I understand creative commons a lot better. Creative commons is a way for owners to have more control about how their work is shared. There are options that allow for remixing or that prevent the use of the work being produced commercially. I think this effects teaching the most. As mentioned in my past posts, sharing is a large part of the teaching process. As a teacher it is important that I understand the laws of copyright and creative commons licenses. Being more knowledgeable about these items allows for me to be a better model of digital citizenship for my students. It is also important that we teach children about the laws and regulations of copyright and creative commons so that they do not grow up with misconceptions like I did.
It is our responsibility as educators to follow copyright laws when selecting the media we use in our classroom. Once again, selecting media the right way is a great way to lead students by example. I know from experience that if a teacher doesn't "practice what they preach", they lose a lot of respect and credibility from the students. An example for me is when I was in seventh grade English and I had a teacher using proper grammar and slang. It made me not want to listen to what she was saying anymore because I wasn't sure if she actually knew what she was talking about. This is an example of how that teacher lost credibility. By teaching students the proper way to use media and how to cite it, we are protecting them from any hardships that can develop from not following copyright laws. As educators, we should always have our students' best interest in mind.
A common area that copyright laws get disobeyed is when it comes to movie sharing and music sharing. I think it is important for us to remember that getting video and music files illegally through file sharing and from pirating websites, it is no different than stealing the movie or CD from the store. We know that ethically physically walking out with an object is stealing and that is wrong. So why does stealing movies and music digitally not feel so bad? I don't really have a good answer for that. I think that we are always in the mindset of needing things immediately, that we try to gain access to them in the quickest and cheapest way possible, forgetting that we are stealing from the musicians, actors and artists responsible for them.
In a classroom like mine that is constantly using technology and different types of media, I feel it is my responsibility to make my students the best digital citizens they can be. If I don't remind them the importance of respecting copyrights and creative common licenses, who will? Hopefully as more people become knowledgeable about these laws and begin to think of the people who create the items being stolen, we will begin to have a positive and safe digital world.
Here is a list of resources that helped me to gain my understanding of copyright and creative commons licenses:
The teacher in this next video really impresses me by how she teaches her students and how she leads by example. Her students also seem to fully understand what is expected of them and they understand what is being taught to them.
This week I am going to review another cool tool. I chose a tool that makes presenting a lesson to students on their own devices, easy. The tool is called Nearpod you can check it out by clicking here. Nearpod allows the teacher to create a lesson that can be viewed live or at the student's pace. Creating a lesson that allows students to complete it at their own pace is great differentiation for the classroom. It helps the students who may take longer to read or follow along to to read the lesson at their own pace. On the other hand students who quickly understand can also go out their pace which helps reduce boredom and distractions.
When in live mode, the students can see what is on the teacher's screen while they are presenting a lesson. Also while in live mode the opportunity for students to collaborate becomes available. This is a really cool feature. I tried it out with one of the fifth grade students that come to my room during recess. She really liked the feature and said she can think of a few ways to use it during her class. Another feature that I really enjoy is the ability to create polls and quizzes during the lesson. This feature is much like Edpuzzle, my first cool review which you can read about here. The polls and quizzes pause the lesson to quickly check for understanding and allows for more student engagement.
Unfortunately, it seems that Nearpod presentations can only be teacher created. I wish that students would be able to use the program to create presentations for their peers. Since students are able to create Google Slides on their own and Nearpod integrates Google slides into its tool really well, I feel this would be the best way for student slide shows to be presented using Nearpod. Uploading PowerPoint presentations is also very easy for Nearpod, so that can be another option for student created work to be integrated into the tool.
Another problem I find with Nearpod is that it has very limited creativity options when creating slides. The text option that is given is standard and cannot be changed. Along with the font itself not being able to be changed, the color of the font is also not able to be changed either. It does say that the slide component is a beta right now, so hopefully they will make more customization options for slides in the future.
A perk of Nearpod is that it is accessible on all devices. I downloaded the app on my phone to see how it fared on an Android device. The outcome was great for being a part of the lesson, but to create an actual presentation is not possible for the phone app. For schools who practice "bring your own device" this would be a great feature. I enjoy that it is easily used from a web browser. Being in an elementary school with limited technology, websites are the easiest way to introduce new tools to my students.
Another positive of Nearpod is the ability to search for images and other media directly through the tool. Some tools require you to look at Google to get certain media instead of making it an option within the tool. I definitely use a lot of images from Google if the copyright allows for it. I like that Nearpod allows me to do this without opening another tab.
To see Nearpod in action, I have created a first grade lesson below that introduces the science content standard that says "the sun warms the earth". In the upcoming weeks, you are going to see my learning process of going to a TAB classroom. This introductory lesson is step one of my journey.
Growing up in the 90's citizenship was a subject that was taught in school. It still is but has evolved from strictly being the proper ways to uphold the duties of the country and society, to including the duties of being a digital user. The internet and other technology has become much more available today than it was while I was going up. The increase of technology definitely has pros, especially in the field of education but it also has many cons as well. Knowing about digital citizenship can eliminate some of the negative side effects of technology. So that brings me to today's topic: "What is digital citizenship?"
Being a citizen in the digital community.
Using the internet and technology makes everyone around the world easily connected and a part of a whole group, no matter their nationality. This makes everyone who uses the internet or technology a citizen of the digital community. The definition of citizenship according to dictionary.com is "the character of an individual viewed as a member of society; behavior in terms of the duties, obligations, and functions of a citizen". Being a citizen of the digital world means that we have duties and obligations to uphold in order to use technology. As a person in the education field, we are already held under a microscope in the outside world, whether it be our life choices, what we wear or how we act in our personal lives. These expectations carry over to the digital world. Not only do we have to model digital citizenship, we are also expected to correct and encourage young minds the correct use of technology and the proper digital citizenship as well.
What is digital citizenship?
To me, digital citizenship is using technology as a tool and maintaining a positive and professional digital footprint. This means that when posting online I must be mindful that anyone can access what I am posting. A general rule for me is to ask myself, "If I were a parent and saw my child's teacher post this, what would I think?", if I feel that it is something that could potentially go against my district rules or make a parent question my morality, I never post it. Even though I have opinions about important issues, if I feel that it could be more offensive than helpful, I do not express them in the online world. I may have conversations with those who are close to me but not in a space so public and easily accessed.
Another part of being a digital citizen in the digital world is who you let inside that "private circle". Many online communities have options to make the important parts of your profiles or blogs private. This can be great for the parts of your personal life that you don't want the whole world to know about, such as vacations or other important moments of your life. The only thing to remember is that nothing is really that private. I have a rule that I don't allow parents to be in my personal circle. If you are like me, on Facebook I have a lot of my coworkers as my friends. Many of my coworkers are in fact parents of some of my students, so with that being said my personal life and professional life cross paths. This is why I make sure that even behind my privacy locks I am still mindful of what I post. Also, coworkers know what is expected of you in your job as well and will probably form their opinions of you based on how you act online.
It's that time to review another cool tool! This time I have gone the infographic route and have used my fifth grade students as resources. The fifth graders past project was drawing planets to scale and coloring them with chalk. They also had to glue the planets on a separate sheet of paper in order from the sun. Here is a sample of their work:
I have many different abilities in my classroom, which is wonderful but means that I have half the class finished and the other half still working. Instead of starting something completely new and causing those who are not finished extra stress, I decided to let the students help me out by researching an infographic maker that they liked. The reason that I wanted them to find an infographic maker was so they could create an infographic about themselves. Which would ultimately help them with our clay lesson of totem spoons. I got the idea of totem spoons from this blog, MY WORK and Play: Student Work-Totem Spoons by Elder Thorkelson. The lesson will be to create a clay spoon that tells a story of their personality and interests, similar to a totem pole.
Back to the research project on infographic makers...
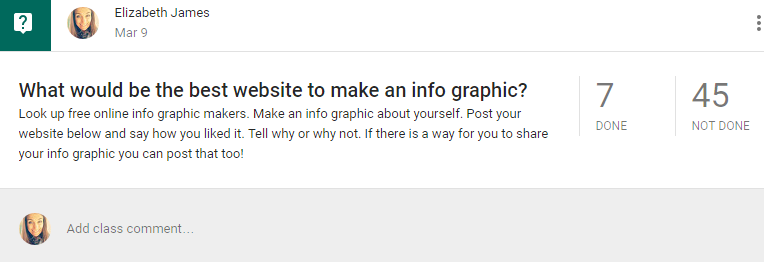
To help the students organize their ideas and discuss their findings with their classmates I created a Google Classroom discussion question:
I chose Venngage mainly because it was the favorite of my students and it seemed like the easiest for them to use. Since this was just a trial assignment, I do not have any student work yet. Hopefully I can update you in the future once we have completed the lesson. In the meantime I will show you my experience with it.
Signing up for Venngage is very simple. I appreciated that when the students selected that they were a student, an email was not required nor was the exchange of personal information. It is really rare to find a tool that has a simple sign up process for students. Once on the website, a surplus of templates are available. Some are premium only, but there are still many that are free.
Venngage offers many different options to create exactly what you want. You can choose from infographics, reports, posters, promotions and social media advertisements. Many of these choices are geared for business rather than education, but some can benefit both fields. An example from the social media category is at the top of this blog. This style is found under the blog headers template. It was very simple to make and took me about five minutes to choose my colors, type my words and add the graphics I wanted. If you want to add some flare to your blogs, I highly recommend this tool!
For this lesson, I am going to have my students focus on the infographic category. One advantage of this tool is that it labels each layout on difficulty, which is very beneficial in an elementary classroom. The three options are beginner, intermediate and advanced. I will encourage my students to use the ones marked beginner since this is their first experience with making an infographic. A disadvantage is that there are very few beginner infographic layouts to choose from.
To start my infographic I chose the "Vibrant Infographic" layout. I had some difficulty manipulating the text that came with the layout. I had to delete the given text boxes and add in my own. Fortunately my fifth graders are really advanced when it comes to manipulating technology, but for those who are not as familiar may have some difficulty and frustration. Once I was able to move the text boxes to where I wanted I appreciated the grid lines that appear to ensure centered words to the page and to other items on the page.
After putting the text I wanted into my infographic I started adding my graphics. I founds that the monochromatic icons had a large selection but the graphics that had a lot of colors were a premium feature. Overall I found myself having a difficult time getting my infographic to be exactly how I envisioned it. That could be in part with being a perfectionist. I am looking forward to finding out whether or not my students have more success. Here is the example I am showing my students:
Once I got the hang of all of the tools and figured out all the cool features I liked this tool. If I were to give it a rating on a scale of 1-5 stars, it would get a 3. I think it is a little difficult to use and can cause frustration easily. Check it out for yourself and let me know what your experience was by leaving a comment below!
Before sitting in class last week, I had no idea what the acronym "TPACK" meant. After learning that it stood for " Technological, Pedagogical And Content Knowledge" I realized that most of the lessons I create for STEAM already incorporate it. In case you are like me and needed to see a visual representation of TPACK, a picture is provided below from the blog "Inside the Classroom, Outside the Box!"
My last post, focused on a technology tool that was new to me, EDpuzzle. As teachers in a technology-filled world, it is vital that we find appropriate tools to use in our classrooms. With that being said, what should be thought about when we are choosing our new technological tools? I have come up with a few questions that I think a teacher should ask before selecting a new tool.
1. What technology will I have available that day?
After a year of having students bring their Chromebooks down from their classroom, I was able to get a cart of Netbooks in my classroom this year. Unfortunately they are not as elementary-school-friendly as the Chromebooks are, but I am ecstatic to have technology that I can call my own. Knowing that the Chromixium operating system does not allow for a smooth transition between Google accounts, I have to make sure the homeroom classroom Chromebooks are available if I want to use Google Classroom.
Along with technology being available I often have to take into consideration internet bandwidth overloads. For example, state testing days. When it is state testing season, using the internet in our rural district for anything else beside the tests, is extra slow if not even impossible.
Another thought to consider when choosing your tool is whether or not it is an operating system specific program. For example, a program may only work on iPads, if that is the case, my Netbooks would be useless for this particular tool. Some schools may have the opposite problem with tools that can only work on Chrome but the technology available is Apple related.
2. Is this tool easy for students to understand from the start or will I need to create a lesson on how to use this tool?
As an elementary teacher who sees all students kindergarten through fifth grade, for 35 minutes a week (with the exception of fourth grade who I see 70 minutes a week), it is important for me to choose more basic tools if the students are using it. If I have to use a whole class period to teach a tool, it takes away from the content I am teaching. The best tools for my classroom are ones that either have a tutorial that allows students to learn on their own or one that I can give a 5-10 minute mini lesson and then have students work on it on their own. A website I use a lot in my class is Scratch, a simple coding website. I have taught a lesson on it in the past for my coding unit but it also has tutorials of many different projects students can make. The site is also very easy to use and understand.
3. Is this a tool that will not be blocked by the school filter?
I have been in some school districts where the online filter is pretty lenient, my school district's filter is the opposite. I have been blocked from some education websites. It is important to check that the website works at school before creating a whole lesson using it just to find out that it is in fact blocked. Not that I have ever had that happen to me or anything.... If you're like me and many of my teacher friends you find yourself planning lessons in your pajamas on a Saturday morning with your cup of coffee in tow. Although it is a much more relaxing environment for lesson writing, your home internet filter is probably not very strict. This is why it is important to check the tool on the school internet browser before you spend precious time developing your lesson.
Hello people of the Internet! Today I am going to review a free online website called EDpuzzle (edpuzzle.com). This website allows teachers to customize online videos from various sources such as YouTube, Khan Academy, and TED Talks. There are other video sources to choose from, I just listed the video sources that were the most familiar to me. The options for customizing the video range from trimming the video to show exactly what you want the students to focus on, to creating voice notes that you have recorded to further explain a concept given in the video. This website would be very beneficial to the flipped classroom or blended classroom. A flipped classroom is where students watch a given lesson on their own time and devote their class time to projects, exercises and discussions ("EDUCAUSE", 2012). A blended classroom is when online learning is combined with classroom learning, allowing students the ability to control their pace, time and place of learning. ("The Basics of Blended Instruction", 2013) As a "specialist" teacher in the elementary I have not ventured into the flipped classroom model, yet. I am much more familiar with the blended learning, as integrating technology is a very important part of all of my lessons.
Aside from editing videos, EDpuzzle also gives the option to create questions that go along with the video as it is playing. These questions can ensure that students are understanding certain points and allows students to monitor their own understanding of the lesson. If a question is not the way you choose to hammer a point home, EDpuzzle also gives the written comment option. Since my school computers do not have microphones, it is easier for me to comment on a point through writing than the voice notes that I mentioned above.
Now that you have an overview of the website, I am going to show and tell of my experience of developing a lesson for my class. I have chosen second grade, as we just finished a unit on creative careers, hopefully I can share that lesson with you in the future!
The lesson I chose to teach comes from the Ohio New Learning Science Standards with a focus on the life science topic, "Interactions Within Habitats: Living Things Cause Changes on Earth". The students will make composting bins as a group with live worms. To better understand what worms need to survive and how they impact the environment, the students will watch an introductory video created using EDpuzzle.
When you first go to https://edpuzzle.com/ you will be brought to the starting page that will look like the picture below:
Creating a teacher account is really easy and free! If you use Google Classroom, connect your school Google account. It was so amazing to me that it imported all of my classes, allowing me to easily share my lessons with my students. You can also create a lesson directly in the class folder. I tested out the student option. It seemed really easy too, it is also free! I used the google option to immediately sign me up, which for elementary students would probably be the easiest. It asks you to join a class, I'm not sure whether or not you will automatically be put into the Google classroom on the site or not.
Once a login has been created a tutorial on how to make your first video comes up. It gives a step-by-step process that is at your own pace. It also allows you to test out each step before moving on to the next one. Being a kinesthetic learner I really appreciated this teaching approach.
Back to my lesson. Last year to teach this lesson I used a really cool TED-Ed video called "Vermicomposting: How worms can reduce our waste - Matthew Ross". I wanted to use this video again and thought that I would try out EDpuzzle with it. Below you can view my lesson creation.
While exploring the EDpuzzle site, I stumbled upon their "Gradebook" option that allows a teacher to use the questions given during the lesson as an assessment. Check out the quick video from the EDpuzzle YouTube channel for more information. Unfortunately this is a paid feature, but they do say you can get it for free if you have a seminar for teachers at your school. I haven't tried that out yet, but I am looking into it.
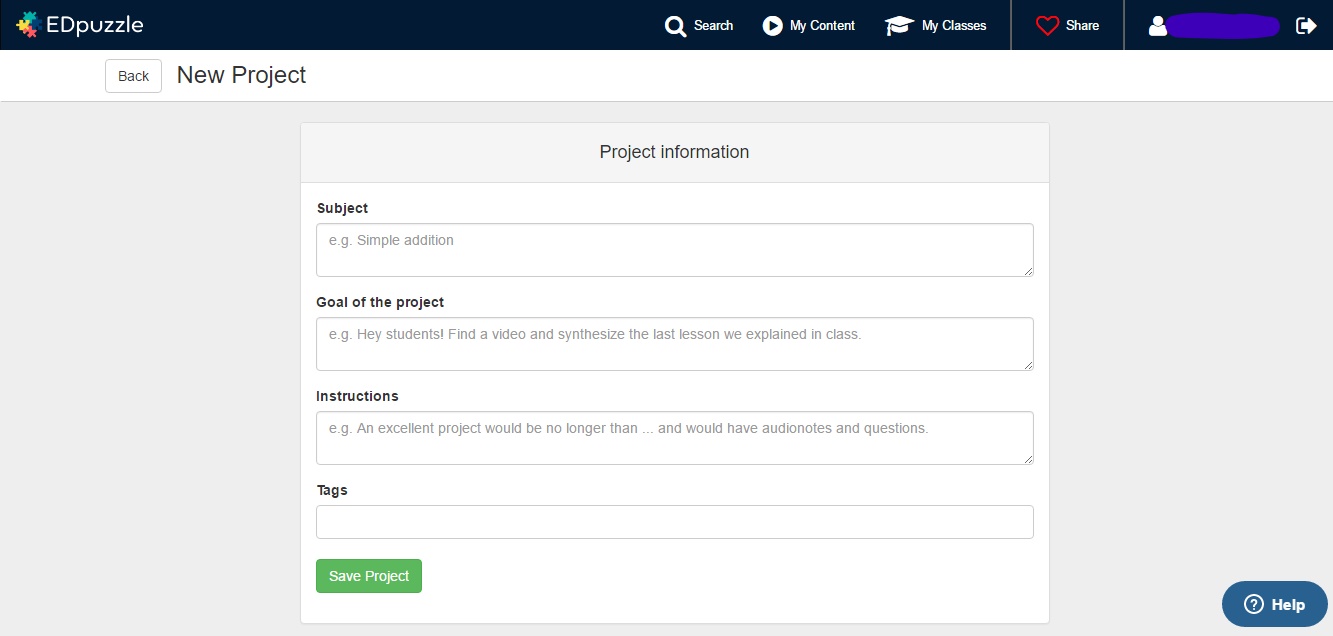
I have really enjoyed using this website. I feel that there are many lessons that I can create for the students in my STEAM classroom. EDpuzzle is a great tool for teachers to create videos, but students can use it too! In the classroom section of the site, you can assign a project. The assignment screen is as appears below:
The teacher gives the subject, goal of the project, and instructions. The students do the rest using the site. I am looking forward to using this with my older students in the future. I think my fifth graders would really enjoy it, especially as they get the "middle school itch" during the fourth nine weeks.
If you have experience using this website and have had some really great lessons. Please let me know, I love learning what others have come up with. As I get more familiar with this website, I will update you. I hope you try it out if you haven't yet! I would love to hear your experience, leave me a comment below. 😊
EDUCAUSE [Advertisement]. (2012, February). Retrieved March 2, 2017, from https://net.educause.edu/ir/library/pdf/eli7081.pdf A. (2013, March). The Basics of Blended Instruction. Retrieved March 02, 2017, from http://www.ascd.org/publications/educational-leadership/mar13/vol70/num06/The-Basics-of-Blended-Instruction.aspx