Trying to get back into the blog-o-sphere. This is the start, more to come soon! :)
Follow my blog with Bloglovin
The S.T.E.A.M. Engine
New to the ideas of S.T.E.A.M.? Not sure about how social media fits in your classroom? Or are you just looking to read ideas from a fellow teacher? If you answered yes to any of these questions. Look around and check out this blog.
Tuesday, October 29, 2019
Thursday, August 17, 2017
New Year, New Classroom
Wow! Where did the summer go?? I feel like with my Grad School classes I barely had a break, now I have two rooms to get ready, with students starting in 6 days! Yikes! Towards the end of last year I started transitioning my classroom to a choice-based room. I have decided to start my year off with a TAB classroom.
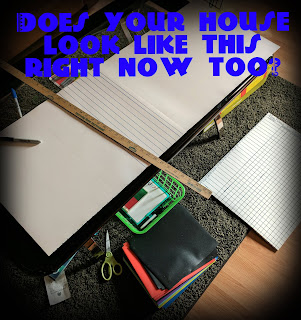
The first thing I decided to do for my classroom this year was to find an easier way to keep track of where a student goes in their choice center. I found a new store in Canton called Everything Education that is amazing! It has the best prices of any educator store I have seen in the area! If you're in Northeastern Ohio, I definitely recommend it! Anyway, while there I found chart paper for $8.99, it is just plain white chart paper, but having to buy two (one for each room) it was worth putting my own lines on. The lined paper was $34 a piece, which compared to other places is still a really good price, it just wasn't in my price range right now. After lining my paper with spots for 28 students on each piece, I wanted to find a way to have the students mark their station. Originally I was going to use bingo daubers, but they are really hard to find! I did finally find them at Dollar Tree just to find out that they bleed through the paper and take a really long time to dry. I opted for stamps instead. I found these rubber letter stamps at Joann Fabrics for $4.27 after my teacher discount and their 25% off all stamp supplies deal. I tested it out and they are perfect! I am going to have an available centers menu that is numbered with each center listed. Students will find their listed number and color associated with it, to mark the station they are headed to. So far this is as far as I have gotten with prep, but once I set it all up in my room, I will update you!
Wednesday, May 3, 2017
Blended Learning
Today I am going to talk a little about blended learning. I know I have touched on this subject in some of my other blog posts. A good example of how I used blended learning in my classroom can be found in my Cool Tool Review #1: EDPuzzle post.
Before taking the instructional technologies application class, for my master's degree, I didn't really think a blended-learning model could be possible in my STEAM class. I thought that I had too many students and that only having students 35-minutes once a week would also make it hard to keep students on track. I was proven wrong. I have now given two different grade levels videos to watch outside of class, so that they can come into class ready to learn.
One of my most successful lessons so far has been teaching my students to make Totem Spoons with clay. Since it is the end of the year and clay is at least a two-week project, I decided to create an EDPuzzle video of a clay technique that my students should know. They had to watch the video outside class before they could complete their clay project. It was really successful. Students answered all of the questions and were ready to start their projects in class. I have been observing my students work and all of them have been attaching their clay the way the video has shown them. By having the students review the technique out of class, I was able to save a whole day of instruction, because by the time I would explain it, there wouldn't be enough time to get clay out and clean it back up.
Here is more information about the lesson I am teaching my 5th graders:
- I introduced my students to what "Totem" and "Spoon" symbolize
- Totem - Tells a story
- Spoon - Symbol of sharing
- Explain they are making a spoon that shares a story about them. To review our clay techniques, students are required to complete this EDPuzzle before the following week
- Students will create sketches of their spoons to help them plan what they are going to make. This coincides with the plan step of the engineering design process.
- Students will create a variation of a spoon with at least 3 descriptive objects about themselves on the spoon.
- Students will glaze the spoon after it has been fired.
Monday, May 1, 2017
What I've Learned from #ITA575
To sum up my experiences from my Instructional Technologies Application class, I decided to make a video blog post. I used Windows Movie Maker to edit my video. I chose this tool because I was inspired by Cassie Stephens to begin creating videos for education and I thought this was the perfect opportunity to try it. I chose Windows Movie Maker over other video editing software because it was free on my laptop and I am somewhat familiar with using it. I also thought that it was easy to import my video from my webcam and realized after I recorded my video, that I could record directly inside the program. I have learned about many different cool tools in this course, which has inspired me to do some research of my own.
I think the biggest take away from this course would be the exposure and encouragement to use technology in the classroom. Like I mentioned above, there were many cool tools introduced in this course. I felt that being required to choose a different one each week, forced me to take risks with technology in my classroom. Some of these risks I still use today, for instance, EDpuzzle. I plan on continuing the use of technology in my classroom. I will begin incorporating a blended-learning idea with having students look at videos that introduce ideas outside of my classroom so that we can use class time for collaboration and creation.
I feel that this course has made me a much better teacher and has encouraged me to take risks in my classroom. I also feel that I use technology in a much more beneficial way instead of just to fulfill a teaching requirement. I have also enjoyed the creation of a blog and PLN. I have begun researching others in my field, beyond Pinterest and have also enjoyed sharing my ideas. I feel that I can help others the way many of their blogs have helped me. I hope to keep this blog up and running.
Tuesday, April 25, 2017
Assessments in the STEAM Classroom
Assessments, a term that I used to dread, especially when I would hear it as a student. As I have gained more information about assessments and moved past the typical paper-pencil tests, I have grown to love-okay maybe that is a strong word- cherish them. I'm not sure whether or not I have explained my background in education to you before, in case I haven't here you go. My undergraduate degree is in early childhood education with a 4-5 generalist endorsement. Therefore I am trained to be a general education teacher preschool-5th grade. Most of my classes taught me how to be a teacher to one, self-contained classroom of 20-30 students that I saw everyday, all year. All of my assessment classes also trained me, with a classroom described above in mind. So, when I ended up in a "specialist" position of teaching S.T.E.A.M. which means I see an average of 10 classes with 20-30 students a day, the idea of assessing over 900 students terrified me. As I am completing my second year of teaching S.T.E.A.M. I am still figuring out what style of assessment works best.
I agree with the statements of Amanda Ronan of Edudemic, who wrote in a blog post that the most important part of assessments is how they are used. Over the summer I took a course in assessments for my master's degree in art education. During the course I learned new techniques to build assessments and new ways to use them. After completing the class, I made my goal of the upcoming school year to increase meaningful assessments in my classroom. I evaluated the effectiveness of my SLO (Student Learning Objective) and edited the wording to eliminate confusion for my students. I also used various styles of questions, to help differentiate my assessment and meet the needs of all students. This was a much-needed evaluation, as a summative assessment like this, determines my effectiveness as a teacher. Well, at least in the eyes of the state.
An SLO is actually both formative and summative. At the beginning of the year, the original SLO is given to determine a baseline for each student. This data can be used to determine what the students already know and areas they have strengths. It is important to use formative data to develop lessons. If students are already masters in an area, yet you continue to teach the material, it is likely that students will no longer pay attention. This could increase behavior issues or distractions for struggling students, who need to learn the material. On the other-hand, moving on from material before the students fully understand it, can cause students to be discouraged in learning any lessons that build on that concept. Therefore, they would struggle in class. Although I am required to give an SLO test, the most common formative assessments I give are by observing and completing a check list. While observing, I can help students immediately if there are any misconceptions, whereas it takes me a day to go through a test. After I do get the opportunity to grade the test, I won't see that student again for a week. By then, the misconception is probably the students reality. That is why I believe observing, checklists and even classroom conversations are the most effective form of formative assessments in my classroom.
As for summative assessments, I feel that rubrics are the most effective. I give my students rubrics to evaluate their work before they turn their assignments in. This allows students to be in charge of their own learning. I will also give students worksheets that go along with their projects to help them get their ideas down on paper. It also gives me a physical sheet to evaluate the students knowledge. I also feel that it helps students stay organized, especially from week to week. I think it is important to look at summative assessments and evaluate whether or not the whole class understands the lesson, through a certain project. If they don't understand, I usually create a new project that touches the basic idea, but is in a different way. I continue the cycle by evaluating the assessments of that lesson and developing my next step again. I continue until I feel confident that the students have learned the concepts.
Overall, I think that it is important that we have formative and summative assessments just to inform our instruction as teachers. There is so much knowledge that can be obtained just through looking at how students have completed each assessment. What kinds of assessments are effective for you? Let me know through Twitter or a comment below.
Some tools I use for assessments:
- EDpuzzle (you can read my blog on it here)
- Google Forms
An example rubric:
Saturday, April 22, 2017
How I Started Running My T.A.B. Classroom
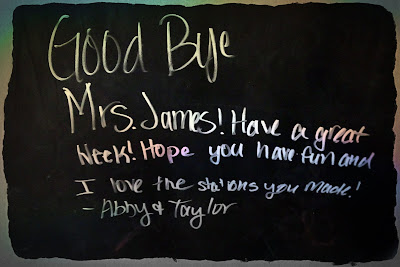
This week in S.T.E.A.M. I started taking the plunge into a choice-based classroom which helps Teach for Artistic Behaviors (T.A.B.). It has been such a rewarding experience. The picture to the left was a response from two of my students who "loved the stations I made". I found this on my whiteboard after their third grade class left, after experiencing stations for the first time. I used Pixlr to edit the whiteboard writing to be more interesting. To see more about Pixlr read my blog from yesterday, Cool Tool #5: Pixlr.
 My lesson for my third grade students was to think about where fractions are represented in the real world. We listed several different options we thought of. As the students were sitting in the "lecture horseshoe" I explained what their required assignment was going to be. They are required to use the media of their choice to create a fraction in the real world. When they design their fraction it cannot be a shape that is divided into pieces it needs to show an actual object. Some examples were a chocolate bar, pie, pizza, etc. Third graders came up with some even more creative ideas, one of the many reasons I love young minds!
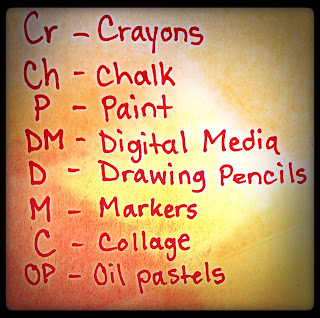
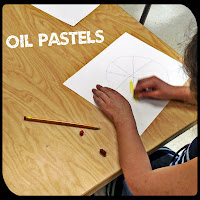
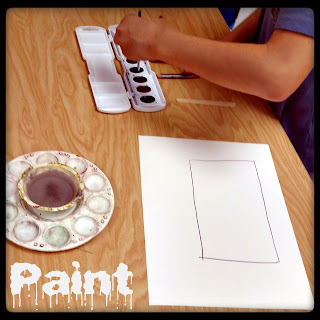
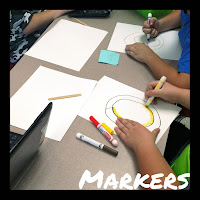
 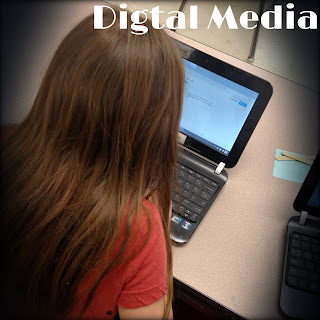 After the lesson was explained I gave each student a Popsicle stick with their name and class code on it. I took this idea from Johanna Russell's T.A.B. classroom in the video I mentioned in my blog post, "Becoming The T.A.B. Classroom". After each student had their Popsicle stick I wrote out the eight stations that were available to them on post-it notes and stuck them on my "demonstration table" in the middle of the lecture horseshoe. The stations that I made available were: crayons, chalk, watercolor paint, digital media (Google Drawings), drawing pencils, markers, collage and oil pastels. Students would choose their station by placing their stick on top of a post-it note face down so no one could see their name. After all the students had chosen, I would rearrange sticks if there were more than five students in a group. if a student had to be moved from their first-choice station, I put a dot and the date on the back of their stick, so that the next time they chose, they would automatically get their first choice. One thing I learned, but forgot to say in my first class was to tell students that once they put their stick in a station, it must stay there. It got a little chaotic without that requirement.
I don't have any completed work yet, unfortunately. After explaining the process and lesson to my students, we only had about five minutes of work time left. I'm looking forward to the weeks to come, as what they have started looks pretty cool. When students left I had two cups for them to put their sticks into. The cups were "I'm finished" and "I need more time". All of my students put their sticks into the "I need more time" cup.
Any thoughts, questions, or ideas are always welcome!
Friday, April 21, 2017
Cool Tool #5: Pixlr
Today I am going to review one of my favorite free photo editors, Pixlr. I have been using Pixlr on my phone for years. It has been my go-to photo editing app, for a very long time. Most of my Instagram posts have gone through Pixlr before being posted. If you look around my blog, you may also notice some pictures have been edited, this has also been done using Pixlr. The picture above was a screenshot of the Pixlr website that I edited with the program. I changed the color to the negative option, added an overlay for the different shapes and then gave it a background. All of that took me about five minutes to complete.
I have tried other photo editing apps in the past, but none of them have made me this happy. I love that Pixlr has a very simple user interface, yet has an endless amount of options to add creative flair to pictures.There are backgrounds, borders, overlays, stickers, text boxes, and so much more that you can add to enhance a picture.
When first arriving at Pixlr.com, you will see three different web app options. They are:
Pixlr O Matic. This web app is a very simplified version of Pixlr Express. There are three steps and you move from one to the next using the next arrows. This app would probably work best with younger elementary students. It gives a taste of editing without being overwhelming.
Pixlr Editor. This web app is the most advanced of the three Pixlr web apps. It would be best suited for high school students or students who are skilled in Photoshop, when editing a picture. A way to use Pixlr Editor in an elementary classroom to start with a new image, which is a white page, and use the sketchy tool to free draw. With my T.A.B. transition, I have introduced a digital media center. In this center, we have been experimenting with Google Drawings. After researching Pixlr Editor, I think that it is easier to draw with, than Google Drawings. I also like that it looks more like an actual drawing than a digital one. There are also so many more authentic drawing options available than in Google Drawings.
Here's an example of a rose I drew, using multiple tools:
The final web app I am going to tell you about is Pixlr Express.
I am most familiar with this app. It is the same on an android device, as it is on the web app. It is very simple to use and like I mentioned above provides many different photo editing options. I think this app is great to make memes or posters for the classroom, if you are a teacher. Using Pixlr Express with students would be easily done. I think most students especially third grade and older would be able to understand the app's features. I can see this being a great way to encourage students to use creativity when they are creating presentations by transforming simple pictures into masterpieces.
I can also see Pixlr Express working with Pixlr Editor or another drawing program. A lesson could be that students draw in the Pixlr Editor, but take their drawings to a whole new level by editing their picture to make it more interesting. For example, take my rose above and look how I edited it in Pixlr Express:
I think that all of the Pixlr Apps have a place in the classroom. It can be used to illustrate a story for English or it can be used as a creative outlet or extension in the art room. I'm sure there are many other subject areas and ways it can be used in your classroom. I highly recommend it! Let me know what you have made or if you have already used it in your classroom. Comment below or tweet me @STEAMJames!
Subscribe to:
Comments (Atom)
