Thursday, August 17, 2017

New Year, New Classroom

Wow! Where did the summer go?? I feel like with my Grad School classes I barely had a break, now  I have two rooms to get ready, with students starting in 6 days! Yikes! Towards the end of last year I started transitioning my classroom to a choice-based room. I have decided to start my year off with a TAB classroom.

The first thing I decided to do for my classroom this year was to find an easier way to keep track of where a student goes in their choice center. I found a new store in Canton called Everything Education that is amazing! It has the best prices of any educator store I have seen in the area! If you're in Northeastern Ohio, I definitely recommend it! Anyway, while there I found chart paper for $8.99, it is just plain white chart paper, but having to buy two (one for each room) it was worth putting my own lines on. The lined paper was $34 a piece, which compared to other places is still a really good price, it just wasn't in my price range right now. After lining my paper with spots for 28 students on each piece, I wanted to find a way to have the students mark their station. Originally I was going to use bingo daubers, but they are really hard to find! I did finally find them at Dollar Tree just to find out that they bleed through the paper and take a really long time to dry. I opted for stamps instead. I found these rubber letter stamps at Joann Fabrics for $4.27 after my teacher discount and their 25% off all stamp supplies deal. I tested it out and they are perfect! I am going to have an available centers menu that is numbered with each center listed. Students will find their listed number and color associated with it, to mark the station they are headed to. So far this is as far as I have gotten with prep, but once I set it all up in my room, I will update you! 

Wednesday, May 3, 2017

Blended Learning


Today I am going to talk a little about blended learning. I know I have touched on this subject in some of my other blog posts. A good example of how I used blended learning in my classroom can be found in my Cool Tool Review #1: EDPuzzle post.

Before taking the instructional technologies application class, for my master's degree, I didn't really think a blended-learning model could be possible in my STEAM class. I thought that I had too many students and that only having students 35-minutes once a week would also make it hard to keep students on track. I was proven wrong. I have now given two different grade levels videos to watch outside of class, so that they can come into class ready to learn.

One of my most successful lessons so far has been teaching my students to make Totem Spoons with clay. Since it is the end of the year and clay is at least a two-week project, I decided to create an EDPuzzle video of a clay technique that my students should know.  They had to watch the video outside class before they could complete their clay project. It was really successful. Students answered all of the questions and were ready to start their projects in class. I have been observing my students work and all of them have been attaching their clay the way the video has shown them. By having the students review the technique out of class, I was able to save a whole day of instruction, because by the time I would explain it, there wouldn't be enough time to get clay out and clean it back up.

Here is more information about the lesson I am teaching my 5th graders:

  1. I introduced my students to what "Totem" and "Spoon" symbolize
    • Totem - Tells a story
    • Spoon - Symbol of sharing
  2. Explain they are making a spoon that shares a story about them. To review our clay techniques, students are required to complete this EDPuzzle before the following week
  3. Students will create sketches of their spoons to help them plan what they are going to make. This coincides with the plan step of the engineering design process. 
  4. Students will create a variation of a spoon with at least 3 descriptive objects about themselves on the spoon.
  5. Students will glaze the spoon after it has been fired. 


Monday, May 1, 2017

What I've Learned from #ITA575


To sum up my experiences from my Instructional Technologies Application class, I decided to make a video blog post. I used Windows Movie Maker to edit my video. I chose this tool because I was inspired by Cassie Stephens to begin creating videos for education and I thought this was the perfect opportunity to try it. I chose Windows Movie Maker over other video editing software because it was free on my laptop and I am somewhat familiar with using it. I also thought that it was easy to import my video from my webcam and realized after I recorded my video, that I could record directly inside the program. I have learned about many different cool tools in this course, which has inspired me to do some research of my own.


I think the biggest take away from this course would be the exposure and encouragement to use technology in the classroom. Like I mentioned above, there were many cool tools introduced in this course. I felt that being required to choose a different one each week, forced me to take risks with technology in my classroom. Some of these risks I still use today, for instance, EDpuzzle. I plan on continuing the use of technology in my classroom. I will begin incorporating a blended-learning idea with having students look at videos that introduce ideas outside of my classroom so that we can use class time for collaboration and creation.

I feel that this course has made me a much better teacher and has encouraged me to take risks in my classroom. I also feel that I use technology in a much more beneficial way instead of just to fulfill a teaching requirement. I have also enjoyed the creation of a blog and PLN. I have begun researching others in my field, beyond Pinterest and have also enjoyed sharing my ideas. I feel that I can help others the way many of their blogs have helped me. I hope to keep this blog up and running.

Tuesday, April 25, 2017

Assessments in the STEAM Classroom


Assessments, a term that I used to dread, especially when I would hear it as a student. As I have gained more information about assessments and moved past the typical paper-pencil tests, I have grown to love-okay maybe that is a strong word- cherish them. I'm not sure whether or not I have explained my background in education to you before, in case I haven't here you go. My undergraduate degree is in early childhood education with a 4-5 generalist endorsement. Therefore I am trained to be a general education teacher preschool-5th grade. Most of my classes taught me how to be a teacher to one, self-contained classroom of 20-30 students that I saw everyday, all year. All of my assessment classes also trained me, with a classroom described above in mind. So, when I ended up in a "specialist" position of teaching S.T.E.A.M. which means I see an average of 10 classes with 20-30 students a day, the idea of assessing over 900 students terrified me. As I am completing my second year of teaching S.T.E.A.M. I am still figuring out what style of assessment works best.

I agree with the statements of Amanda Ronan of Edudemic, who wrote in a blog post that the most important part of assessments is how they are used. Over the summer I took a course in assessments for my master's degree in art education. During the course I learned new techniques to build assessments and new ways to use them. After completing the class, I made my goal of the upcoming school year to increase meaningful assessments in my classroom. I evaluated the effectiveness of my SLO (Student Learning Objective) and edited the wording to eliminate confusion for my students. I also used various styles of questions, to help differentiate my assessment and meet the needs of all students. This was a much-needed evaluation, as a summative assessment like this, determines my effectiveness as a teacher. Well, at least in the eyes of the state.

An SLO is actually both formative and summative. At the beginning of the year, the original SLO is given to determine a baseline for each student. This data can be used to determine what the students already know and areas they have strengths. It is important to use formative data to develop lessons. If students are already masters in an area, yet you continue to teach the material, it is likely that students will no longer pay attention. This could increase behavior issues or distractions for struggling students, who need to learn the material. On the other-hand, moving on from material before the students fully understand it, can cause students to be discouraged in learning any lessons that build on that concept. Therefore, they would struggle in class. Although I am required to give an SLO test, the most common formative assessments I give are by observing and completing a check list. While observing, I can help students immediately if there are any misconceptions, whereas it takes me a day to go through a test. After I do get the opportunity to grade the test, I won't see that student again for a week. By then, the misconception is probably the students reality. That is why I believe observing, checklists and even classroom conversations are the most effective form of formative assessments in my classroom.


As for summative assessments, I feel that rubrics are the most effective. I give my students rubrics to evaluate their work before they turn their assignments in. This allows students to be in charge of their own learning. I will also give students worksheets that go along with their projects to help them get their ideas down on paper. It also gives me a physical sheet to evaluate the students knowledge. I also feel that it helps students stay organized, especially from week to week. I think it is important to look at summative assessments and evaluate whether or not the whole class understands the lesson, through a certain project. If they don't understand, I usually create a new project that touches the basic idea, but is in a different way. I continue the cycle by evaluating the assessments of that lesson and developing my next step again. I continue until I feel confident that the students have learned the concepts.

Overall, I think that it is important that we have formative and summative assessments just to inform our instruction as teachers. There is so much knowledge that can be obtained just through looking at how students have completed each assessment. What kinds of assessments are effective for you? Let me know through Twitter or a comment below.

Some tools I use for assessments:

An example rubric:


Saturday, April 22, 2017

How I Started Running My T.A.B. Classroom


This week in S.T.E.A.M. I started taking the plunge into a choice-based classroom which helps Teach for Artistic Behaviors (T.A.B.). It has been such a rewarding experience. The picture to the left was a response from two of my students who "loved the stations I made". I found this on my whiteboard after their third grade class left, after experiencing stations for the first time. I used Pixlr to edit the whiteboard writing to be more interesting. To see more about Pixlr read my blog from yesterday, Cool Tool #5: Pixlr.


My lesson for my third grade students was to think about where fractions are represented in the real world. We listed several different options we thought of. As the students were sitting in the "lecture horseshoe" I explained what their required assignment was going to be. They are required to use the media of their choice to create a fraction in the real world. When they design their fraction it cannot be a shape that is divided into pieces it needs to show an actual object. Some examples were a chocolate bar, pie, pizza, etc. Third graders came up with some even more creative ideas, one of the many reasons I love young minds! 
 After the lesson was explained I gave each student a Popsicle stick with their name and class code on it. I took this idea from Johanna Russell's T.A.B. classroom in the video I mentioned in my blog post, "Becoming The T.A.B. Classroom". After each student had their Popsicle stick I wrote out the eight stations that were available to them on post-it notes and stuck them on my "demonstration table" in the middle of the lecture horseshoe. The stations that I made available were: crayons, chalk, watercolor paint, digital media (Google Drawings), drawing pencils, markers, collage and oil pastels. Students would choose their station by placing their stick on top of a post-it note face down so no one could see their name. After all the students had chosen, I would rearrange sticks if there were more than five students in a group. if a student had to be moved from their first-choice station, I put a dot and the date on the back of their stick, so that the next time they chose, they would automatically get their first choice. One thing I learned, but forgot to say in my first class was to tell students that once they put their stick in a station, it must stay there. It got a little chaotic without that requirement.
I don't have any completed work yet, unfortunately. After explaining the process and lesson to my students, we only had about five minutes of work time left. I'm looking forward to the weeks to come, as what they have started looks pretty cool. When students left I had two cups for them to put their sticks into. The cups were "I'm finished" and "I need more time". All of my students put their sticks into the "I need more time" cup.

 I really like the choice-based/T.A.B. classroom, so far. I am looking forward to continuing my growth with this setup, I can definitely see it benefiting the concepts of S.T.E.A.M. I hope to start out with it next year and see how a whole year of choices will turn out. I want to keep you informed and I will do the best I can with keeping you up-to-date.

Any thoughts, questions, or ideas are always welcome!


Friday, April 21, 2017

Cool Tool #5: Pixlr

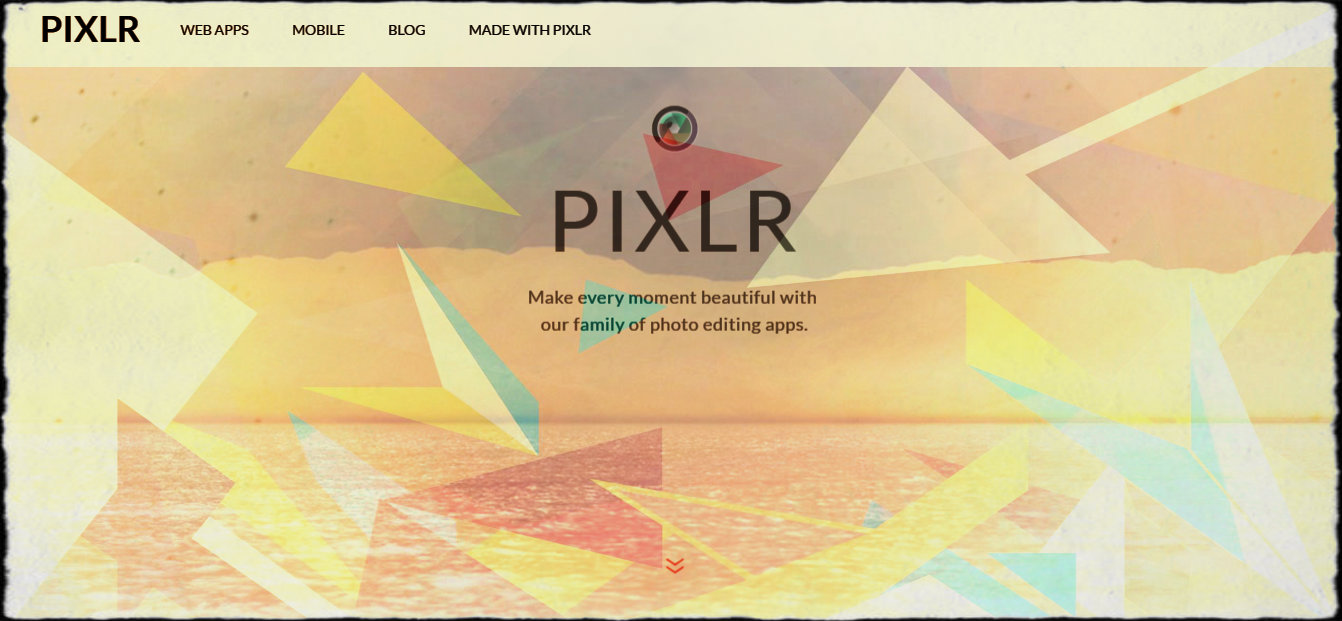
Today I am going to review one of my favorite free photo editors, Pixlr. I have been using Pixlr on my phone for years. It has been my go-to photo editing app, for a very long time. Most of my Instagram posts have gone through Pixlr before being posted. If you look around my blog, you may also notice some pictures have been edited, this has also been done using Pixlr. The picture above was a screenshot of the Pixlr website that I edited with the program. I changed the color to the negative option, added an overlay for the different shapes and then gave it a background. All of that took me about five minutes to complete.

I have tried other photo editing apps in the past, but none of them have made me this happy. I love that Pixlr has a very simple user interface, yet has an endless amount of options to add creative flair to pictures.There are backgrounds, borders, overlays, stickers, text boxes, and so much more that you can add to enhance a picture.

When first arriving at Pixlr.com, you will see three different web app options. They are:


Pixlr O Matic. This web app is a very simplified version of Pixlr Express. There are three steps and you move from one to the next using the next arrows. This app would probably work best with younger elementary students. It gives a taste of editing without being overwhelming.


Pixlr Editor. This web app is the most advanced of the three Pixlr web apps. It would be best suited for high school students or students who are skilled in Photoshop, when editing a picture. A way to use Pixlr Editor in an elementary classroom to start with a new image, which is a white page, and use the sketchy tool to free draw. With my T.A.B. transition, I have introduced a digital media center. In this center, we have been experimenting with Google Drawings. After researching Pixlr Editor, I think that it is easier to draw with, than Google Drawings. I also like that it looks more like an actual drawing than a digital one. There are also so many more authentic drawing options available than in Google Drawings.

Here's an example of a rose I drew, using multiple tools:

The final web app I am going to tell you about is Pixlr Express.

I am most familiar with this app. It is the same on an android device, as it is on the web app. It is very simple to use and like I mentioned above provides many different photo editing options. I think this app is great to make memes or posters for the classroom, if you are a teacher. Using Pixlr Express with students would be easily done. I think most students especially third grade and older would be able to understand the app's features. I can see this being a great way to encourage students to use creativity when they are creating presentations by transforming simple pictures into masterpieces.

I can also see Pixlr Express working with Pixlr Editor or another drawing program. A lesson could be that students draw in the Pixlr Editor, but take their drawings to a whole new level by editing their picture to make it more interesting. For example, take my rose above and look how I edited it in Pixlr Express:


I think that all of the Pixlr Apps have a place in the classroom. It can be used to illustrate a story for English or it can be used as a creative outlet or extension in the art room. I'm sure there are many other subject areas and ways it can be used in your classroom. I highly recommend it! Let me know what you have made or if you have already used it in your classroom. Comment below or tweet me @STEAMJames!

Saturday, April 15, 2017

Let's Talk About Learning Spaces


If you haven't realized it yet, I love to try new things in my instruction and have a very unorthodox classroom. With that being said, my learning space is also very different from the ordinary classroom. Many of my colleagues are surprised to see how my students are working when they walk into my room during the day. Sometimes my students are sitting at tables, but that is on a very rare occasion, as you know from my "Dare to Un-chair" blog, I typically do not have chairs in my room. Most of the time when you walk in my room my students are either standing around the table, sprawled out on the floor or sitting somewhere else around the room. I have witnessed some interesting things happen in my classroom with the multiple learning spaces I have created.


Increased Engagement and Learning:

Ever since I have changed my room to no chairs, I have watched my students' work increase. Since the students are standing while I give lectures, I find that the students who usually fidget with things they are not supposed to be touching, are just moving their bodies instead. They are usually looking at me and listening while they are doing this. I have also noticed that their work quality has increased and their creativity has also made a significant jump as compared to my previous classroom setup. I don't know if it is the increase of blood flow to their brain or just the ability to get comfortable that has made these changes occur.

With my new TAB setup, the children loved the change. It seems that every time I change my room, the students get excited about it and seem to be on task for a longer period of time. With all the stations spreading my students all over the room, behavior issues have gone down. Students are no longer crammed into one uncomfortable learning space, instead they can go to a place of their choice and one that is comfortable for them. When students choose what they want to do, they are more likely to stay engaged with the activity longer.


Google Apps for Education and Learning Spaces:

I love Google Apps for Education. I am constantly using them with my upper elementary students and sometimes with my younger elementary students. One of my favorites is Google Classroom. When I start lessons with apps, I have my students go to my Google Classroom first, to get their assignment. With students scattered all over my room, having assignments in Google Classroom is so much more effective, than my old style of teaching. My old style was to write the assignment on the white board and have students at their seat working. When students are under tables, sprawled out on the floor or sitting at a station that has their back to the board, teaching this way is no longer logical. When a student goes into Google Classroom, they are able to see the assignment from the comfort of their new seat. I also like that an absent student can easily access what they have missed.

I have started to incorporate a digital media station in my TAB Classroom setup. With this in mind I have been teaching more Google Apps and other creative education apps, to my students. I want my students to know how to use the apps correctly before I set them free to use them on their own.

Take the risk:

I think sometimes as teachers we get stuck doing what is comfortable or easy, instead of taking risks. I know that many of my colleagues are intimidated by the noise and what looks to be chaos in my room. From an "outside-looking-in" perspective, I'm sure it looks pretty crazy. What I know, though, is that every one of my students is working and doing so in a way that best suites their needs.

Have you already taken the risk or do you have suggestions on other learning spaces? Let me know!

Saturday, April 8, 2017

The TAB Transformation: A Long Work in Progress.


Transforming my room into a TAB classroom has been a lot of work. I am very grateful that I have had a couple diligent 5th graders who come in twice a week to help me make posters for each center and organize materials. This past week I have been setting up for my STEAM Showcase, which is an art show for my third through fifth graders at both elementary schools. It is also a lot of work, so a lot of my TAB creation has been done by my fifth graders.

I did introduce some choice-based lessons to my kindergarten and first grade students, this week. The students loved the idea of being in charge of what materials they used to complete their assignment. The assignment I chose to experiment with was an extension to the book, "The Day The Crayons Quit" by Drew Daywalt. If you have never read that book it is a hilarious story told by crayons about their complaints of how their owner uses them. It is a great character building story and perfect for an art room.

My students are hard at work while choosing where to sit and which material to use.

Back to my lesson. After we read the book, I had the first students write letters to the crayons to convince them to come back and to draw a picture showing why they needed that color. I allowed my students to choose from the following art supplies: crayons, colored pencils and markers. For my kindergartners, I had them draw a picture of a crayon but they had to practice their 3-dimensional shape drawing skills. They also had to give the crayon a people-like expression and some clothes. I gave the kindergartners the same material choices. Overall I found the choice-based lesson to be beneficial. In my next post I am going to talk about flexible seating and the classroom environment. The way the choices worked, students got comfortable and were sprawled all over the room. It limited behavior issues and allowed students to perform in a comfortable environment.

I think with this small taste of TAB/choice-based curriculum, it is just leaving me hungry for more. I am looking forward to when I can jump into my new TAB curriculum, full-forced.

If you have any suggestions or would like to know the other ways I used "The Day the Crayons Quit" please contact me through Twitter or the comment section below!

Cool Tool #4: Seesaw


The cool tool I chose this week is Seesaw. I started Seesaw with the thought that it was an eBook creator for elementary students. What I learned was that it is much more than that. Seesaw is a great app that allows students to share their ideas but also read and comment on the ideas of others. There are six different choices to express yourself.

Students and the teacher can post photos either from the computer or take one directly with the webcam. At my school we mostly use netbooks and Chromebooks, so having saved pictures on the computer is difficult. Having the option to use the webcam is a definite pro for this app. Along with the option to take a picture with the website, you can also record a video using the website, as well. I think this option would be great to introduce new lessons or to promote a flipped classroom. You can also import previously recorded videos too. If you want to important a video from a website you will have to go to the add link option. 

The drawing option is really neat. There are many different colors to choose from and it does a pretty job of understanding where you want things drawn. Some drawing programs like Google Draw, the mouse has a difficult time communicating with program, which makes drawing in the app inaccurate. 

I also like that the drawing app has the option to add text too. There are a couple different options for the writing. It can have different fonts and backgrounds to make the drawings even more interesting. this would be a good tool to use to create a cover for a story. 

I used this cool tool with my after school tutoring third and fifth graders. We decided to create adventure stories and share them in Seesaw. Below is the cover I posted to my students as an example. 

Another option for sharing content on Seesaw is the note option. This is where I had my students write the content of their story. After you publish the note, you cannot edit it. This is frustrating, as a very beneficial part of eBooks is the ability to continuously edit it. This is a con of the tool, unfortunately. I do like it as a brainstorming process, though. My students liked that once they posted a note and the teacher improved it, they could read other students' notes as well. I had students from two different buildings  in the same classroom on the tool. Both sets of students were actively engaged in reading and commenting on others' stories. It was really cool to see their peer reviews and support they left for each other. Here are some of my students' stories:
Above is by a 4th grade girl, who's name is left off for her privacy. 
Above is by a 4th grade boy, who's name is left off for privacy. 

The above picture is by a 5th grade girl. 
My students really enjoyed this cool tool. They have been asking me everyday since I introduced it to them, if they could get on it. I have also noticed that some of them got on it at home or in their free time. I think it is important that students are excited about writing, because when you are excited about something you usually do it more often. Writing is something that improves with practice. I also am a huge advocate for creativity, which this tool definitely offers. I can see its value in other subjects as well. I would like to use it in my STEAM classroom, in the future. 

Have you ever used Seesaw? What do you think about it? How did you use it? Let me know in the comments below. 


Friday, March 31, 2017

TAB Classroom Progress

This week all of my free time has been spent on creating posters for my different centers, along with doing research. Here is a picture of the posters that are in progress with some help from my fifth graders. 


Some great resources I have found so far have been:

I haven't gotten the opportunity to use some of these techniques yet. I am hoping to start on Monday. I will let you know how it goes. If you have any suggestions or ideas, I'd love to here them. Comment on here or tweet me @STEAMJames.
You can use the QR Scanner in your Twitter app to add me here:


Monday, March 27, 2017

Let's Talk About Ebooks


What do you think when you hear the word "ebook"? Before class last week, I thought of ebooks as an alternate to paper textbooks and novels, a compilation of words to share knowledge that is written by an accredited author.  I had never thought about turning my students into authors of their own ebooks.

There are advantages and disadvantages to student-created ebooks. An advantage is the ability to continuously edit the writing. One of the steps of the writing process is to edit and revise. When writing an ebook the book is never permanently finished. For new writers this is great because as they learn about new techniques and ideas, they can go back into their ebook and improve it. This is also a good example of the improve step of the engineering design process.

A disadvantage of using ebooks to practice the writing process is that spellcheck and grammar check can prevent the student from actually knowing the proper use or spellings of words. As a teacher it is important that we stress not to rely on the spellchecker, because it isn't always correct.

A great example of a teacher who uses ebooks in his classroom is Jon Smith. He is an ibook ambassador, you can find his students' books at this website: http://mrsmithtrt.weebly.com/class-ebooks.html. I really enjoyed his collaboration books. He includes different grade levels to create books. The book, "Monsterpieces" had 3rd grade students draw the monsters and high school monsters remastered them to create the "monsterpieces". I really like this younger student to older student collaboration. It has inspired me to want to start creating ebooks in my STEAM classes. I didn't think it would be easily done until I saw some of his examples. I love the idea of having my 5th grade students write a story and finishing the story with kindergarten illustrations.

I think using ebooks in the classroom will increase engagement. Jon Smith has said that it has made students more excited about writing too. I like the idea that students will open their audience to beyond their small social circle. When students think about getting their work out there for anyone, they tend to have better quality work. I have noticed this when I tell them that I will be putting some of their artwork on my blog.

Have you used ebooks in your classroom already? Do you have ideas for them in the future? Let me know by commenting below. 

Thursday, March 23, 2017

Turning My STEAM Classroom into a TAB Classroom: An Online Journey

Hello and welcome to my TAB classroom journey. The next couple of weeks you will get to experience my classroom's transformation. I will try my best to share my experiences and ideas as I go along. I hope you enjoy and maybe even find some inspiration to try something new, too! If you do, I would love to hear about it! Please leave a comment below or contact me through one of my various social media sources.

Introduction:
In order for me to properly take you on the journey with me, you need to know how and why I have decided to go towards the TAB classroom idea. So let's start at the beginning. In my district we have the opportunity to turn two of our professional development days into "trade days". A trade day is just what it sounds like, we get to trade a typical professional development day into a day off if we complete a class with other teachers throughout a three month period. For my April trade day, I joined the art teachers in our district to go over the Art of Ed's Winter Conference. While choosing our conference sessions, I came across one called "Infusing STEAM concepts into a TAB Classroom" by Kelly Phillips. Since my education license and background is not actually in art, I had no idea what a TAB classroom was. It was originally the STEAM acronym that caught my eye. So I asked the seasoned art teachers what it meant. The high school teacher, Sara, explained to me that it stood for teaching artistic behaviors or choice-based-curriculum. This idea intrigued me so I decided to research it on my own. I found a lot of information from the website, TAB Teaching for Artistic Behavior. Here is what I discovered:

Sunday, March 19, 2017

What Do You Know About Copyright and Creative Commons?


If you use anything from lessons, to books, to worksheets for your classroom, you have probably heard the word "copyright". Even though you have heard it, do you actually know what it means? I thought I knew what copyright meant, but now that I have dug into the concept further, I have realized I haven't really understood it. I had always thought copyright was a legal document that you had to apply to get. I have been confusing copyright with getting a patent, though similar they are not the same. Before learning more about copyrights, I didn't realize that anything a person creates and shares, comes with an automatic copyright attached. Like I mentioned above, I always thought it was something you had to buy and get legalized. I am relieved to know that all of the items I post online actually is protected by a copyright. 

Since sharing is a large part of teaching, I think creative commons is another vital part of the copyright process. I wasn't very familiar with creative commons when I first began this assignment. Through watching various informational videos and reading articles on the matter, I understand creative commons a lot better. Creative commons is a way for owners to have more control about how their work is shared. There are options that allow for remixing or that prevent the use of the work being produced commercially. I think this effects teaching the most. As mentioned in my past posts, sharing is a large part of the teaching process. As a teacher it is important that I understand the laws of copyright and creative commons licenses. Being more knowledgeable about these items allows for me to be a better model of digital citizenship for my students. It is also important that we teach children about the laws and regulations of copyright and creative commons so that they do not grow up with misconceptions like I did. 

It is our responsibility as educators to follow copyright laws when selecting the media we use in our classroom. Once again, selecting media the right way is a great way to lead students by example. I know from experience that if a teacher doesn't "practice what they preach", they lose a lot of respect and credibility from the students. An example for me is when I was in seventh grade English and I had a teacher using proper grammar and slang. It made me not want to listen to what she was saying anymore because I wasn't sure if she actually knew what she was talking about. This is an example of how that teacher lost credibility. By teaching students the proper way to use media and how to cite it, we are protecting them from any hardships that can develop from not following copyright laws. As educators, we should always have our students' best interest in mind. 

A common area that copyright laws get disobeyed is when it comes to movie sharing and music sharing. I think it is important for us to remember that getting video and music files illegally through file sharing and from pirating websites, it is no different than stealing the movie or CD from the store. We know that ethically physically walking out with an object is stealing and that is wrong. So why does stealing movies and music digitally not feel so bad? I don't really have a good answer for that. I think that we are always in the mindset of needing things immediately, that we try to gain access to them in the quickest and cheapest way possible, forgetting that we are stealing from the musicians, actors and artists responsible for them. 

In a classroom like mine that is constantly using technology and different types of media, I feel it is my responsibility to make my students the best digital citizens they can be. If I don't remind them the importance of respecting copyrights and creative common licenses, who will? Hopefully as more people become knowledgeable about these laws and begin to think of the people who create the items being stolen, we will begin to have a positive and safe digital world. 

Here is a list of resources that helped me to gain my understanding of copyright and creative commons licenses:


The teacher in this next video really impresses me by how she teaches her students and how she leads by example. Her students also seem to fully understand what is expected of them and they understand what is being taught to them. 

Other resources:

Cool Tool #3: Nearpod


 This week I am going to review another cool tool. I chose a tool that makes presenting a lesson to students on their own devices, easy. The tool is called Nearpod you can check it out by clicking here. Nearpod allows the teacher to create a lesson that can be viewed live or at the student's pace. Creating a lesson that allows students to complete it at their own pace is great differentiation for the classroom. It helps the students who may take longer to read or follow along to to read the lesson at their own pace. On the other hand students who quickly understand can also go out their pace which helps reduce boredom and distractions.

When in live mode, the students can see what is on the teacher's screen while they are presenting a lesson. Also while in live mode the opportunity for students to collaborate becomes available. This is  a really cool feature. I tried it out with one of the fifth grade students that come to my room during recess. She really liked the feature and said she can think of a few ways to use it during her class. Another feature that I really enjoy is the ability to create polls and quizzes during the lesson. This feature is much like Edpuzzle, my first cool review which you can read about here. The polls and quizzes pause the lesson to quickly check for understanding and allows for more student engagement.

Unfortunately, it seems that Nearpod presentations can only be teacher created. I wish that students would be able to use the program to create presentations for their peers. Since students are able to create Google Slides on their own and Nearpod integrates Google slides into its tool really well, I feel this would be the best way for student slide shows to be presented using Nearpod. Uploading PowerPoint presentations is also very easy for Nearpod, so that can be another option for student created work to be integrated into the tool.


Another problem I find with Nearpod is that it has very limited creativity options when creating slides. The text option that is given is standard and cannot be changed. Along with the font itself not being able to be changed, the color of the font is also not able to be changed either.  It does say that the slide component is a beta right now, so hopefully they will make more customization options for slides in the future.

A perk of Nearpod is that it is accessible on all devices. I downloaded the app on my phone to see how it fared on an Android device. The outcome was great for being a part of the lesson, but to create an actual presentation is not possible for the phone app. For schools who practice "bring your own device" this would be a great feature. I enjoy that it is easily used from a web browser. Being in an elementary school with limited technology, websites are the easiest way to introduce new tools to my students.

Another positive of Nearpod is the ability to search for images and other media directly through the tool. Some tools require you to look at Google to get certain media instead of making it an option within the tool. I definitely use a lot of images from Google if the copyright allows for it. I like that Nearpod allows me to do this without opening another tab.

To see Nearpod in action, I have created a first grade lesson below that introduces the science content standard that says "the sun warms the earth". In the upcoming weeks, you are going to see my learning process of going to a TAB classroom. This introductory lesson is step one of my journey.

Saturday, March 11, 2017

Digital Citizenship (Part 1):What's that?


Growing up in the 90's citizenship was a subject that was taught in school. It still is but has evolved from strictly being the proper ways to uphold the duties of the country and society, to including the duties of being a digital user. The internet and other technology has become much more available today than it was while I was going up. The increase of technology definitely has pros, especially in the field of education but it also has many cons as well. Knowing about digital citizenship can eliminate some of the negative side effects of technology. So that brings me to today's topic: "What is digital citizenship?" 


Being a citizen in the digital community.
Using the internet and technology makes everyone around the world easily connected and a part of a whole group, no matter their nationality. This makes everyone who uses the internet or technology a citizen of the digital community. The definition of citizenship according to dictionary.com is "the character of an individual viewed as a member of society; behavior in terms of the duties, obligations, and functions of a citizen". Being a citizen of the digital world means that we have duties and obligations to uphold in order to use technology. As a person in the education field, we are already held under a microscope in the outside world, whether it be our life choices, what we wear or how we act in our personal lives. These expectations carry over to the digital world. Not only do we have to model digital citizenship, we are also expected to correct and encourage young minds the correct use of technology and the proper digital citizenship as well. 


What is digital citizenship?
To me, digital citizenship is using technology as a tool and maintaining a positive and professional digital footprint. This means that when posting online I must be mindful that anyone can access what I am posting. A general rule for me is to ask myself, "If I were a parent and saw my child's teacher post this, what would I think?", if I feel that it is something that could potentially go against my district rules or make a parent question my morality, I never post it. Even though I have opinions about important issues, if I feel that it could be more offensive than helpful, I do not express them in the online world. I may have conversations with those who are close to me but not in a space so public and easily accessed. 
Another part of being a digital citizen in the digital world is who you let inside that "private circle". Many online communities have options to make the important parts of your profiles or blogs private. This can be great for the parts of your personal life that you don't want the whole world to know about, such as vacations or other important moments of your life. The only thing to remember is that nothing is really that private. I have a rule that I don't allow parents to be in my personal circle. If you are like me, on Facebook I have a lot of my coworkers as my friends. Many of my coworkers are in fact parents of some of my students, so with that being said my personal life and professional life cross paths. This is why I make sure that even behind my privacy locks I am still mindful of what I post. Also, coworkers know what is expected of you in your job as well and will probably form their opinions of you based on how you act online. 


Friday, March 10, 2017

Cool Tool #2: Venngage


It's that time to review another cool tool! This time I have gone the infographic route and have used my fifth grade students as resources. The fifth graders past project was drawing planets to scale and coloring them with chalk. They also had to glue the planets on a separate sheet of paper in order from the sun. Here is a sample of their work:


I have many different abilities in my classroom, which is wonderful but means that I have half the class finished and the other half still working. Instead of starting something completely new and causing those who are not finished extra stress, I decided to let the students help me out by researching an infographic maker that they liked. The reason that I wanted them to find an infographic maker was so they could create an infographic about themselves. Which would ultimately help them with our clay lesson of totem spoons. I got the idea of totem spoons from this blog, MY WORK and Play: Student Work-Totem Spoons by Elder Thorkelson. The lesson will be to create a clay spoon that tells a story of their personality and interests, similar to a totem pole. 

Back to the research project on infographic makers...
To help the students organize their ideas and discuss their findings with their classmates I created a Google Classroom discussion question:


The list the students came up with were:
I chose Venngage mainly because it was the favorite of my students and it seemed like the easiest for them to use. Since this was just a trial assignment, I do not have any student work yet. Hopefully I can update you in the future once we have completed the lesson. In the meantime I will show you my experience with it. 

Signing up for Venngage is very simple. I appreciated that when the students selected that they were a student, an email was not required nor was the exchange of personal information. It is really rare to find a tool that has a simple sign up process for students. Once on the website, a surplus of templates are available. Some are premium only, but there are still many that are free. 

Venngage offers many different options to create exactly what you want. You can choose from infographics, reports, posters, promotions and social media advertisements. Many of these choices are geared for business rather than education, but some can benefit both fields. An example from the social media category is at the top of this blog. This style is found under the blog headers template. It was very simple to make and took me about five minutes to choose my colors, type my words and add the graphics I wanted. If you want to add some flare to your blogs, I highly recommend this tool! 

For this lesson, I am going to have my students focus on the infographic category. One advantage of this tool is that it labels each layout on difficulty, which is very beneficial in an elementary classroom. The three options are beginner, intermediate and advanced. I will encourage my students to use the ones marked beginner since this is their first experience with making an infographic. A disadvantage is that there are very few beginner infographic layouts to choose from. 

To start my infographic I chose the "Vibrant Infographic" layout. I had some difficulty manipulating the text that came with the layout. I had to delete the given text boxes and add in my own. Fortunately my fifth graders are really advanced when it comes to manipulating technology, but for those who are not as familiar may have some difficulty and frustration. Once I was able to move the text boxes to where I wanted I appreciated the grid lines that appear to ensure centered words to the page and to other items on the page. 

After putting the text I wanted into my infographic I started adding my graphics. I founds that the monochromatic icons had a large selection but the graphics that had a lot of colors were a premium feature. Overall I found myself having a difficult time getting my infographic to be exactly how I envisioned it. That could be in part with being a perfectionist. I am looking forward to finding out whether or not my students have more success. Here is the example I am showing my students:

Once I got the hang of all of the tools and figured out all the cool features I liked this tool. If I were to give it a rating on a scale of 1-5 stars, it would get a 3. I think it is a little difficult to use and can cause frustration easily. Check it out for yourself and let me know what your experience was by leaving a comment below!

Tuesday, March 7, 2017

TPACK Attack!

Before sitting in class last week, I had no idea what the acronym "TPACK" meant. After learning that it stood for " Technological, Pedagogical And Content Knowledge" I realized that most of the lessons I create for STEAM already incorporate it.  In case you are like me and needed to see a visual representation of  TPACK, a picture is provided below from the blog "Inside the Classroom, Outside the Box!"


My last post, focused on a technology tool that was new to me, EDpuzzle. As teachers in a technology-filled world, it is vital that we find appropriate tools to use in our classrooms. With that being said, what should be thought about when we are choosing our new technological tools? I have come up with a few questions that I think a teacher should ask before selecting a new tool.

1. What technology will I have available that day?

After a year of having students bring their Chromebooks down from their classroom, I was able to get a cart of Netbooks in my classroom this year. Unfortunately they are not as elementary-school-friendly as the Chromebooks are, but I am ecstatic to have technology that I can call my own. Knowing that the Chromixium operating system does not allow for a smooth transition between Google accounts, I have to make sure the homeroom classroom Chromebooks are available if I want to use Google Classroom. 

Along with technology being available I often have to take into consideration internet bandwidth overloads. For example, state testing days. When it is state testing season, using the internet in our rural district for anything else beside the tests, is extra slow if not even impossible. 

Another thought to consider when choosing your tool is whether or not it is an operating system specific program. For example, a program may only work on iPads, if that is the case, my Netbooks would be useless for this particular tool. Some schools may have the opposite problem with tools that can only work on Chrome but the technology available is Apple related. 

2. Is this tool easy for students to understand from the start or will I need to create a lesson on how to use this tool?

As an elementary teacher who sees all students kindergarten through fifth grade, for 35 minutes a week (with the exception of fourth grade who I see 70 minutes a week), it is important for me to choose more basic tools if the students are using it. If I have to use a whole class period to teach a tool, it takes away from the content I am teaching. The best tools for my classroom are ones that either have a tutorial that allows students to learn on their own or one that I can give a 5-10 minute mini lesson and then have students work on it on their own. A website I use a lot in my class is Scratch, a simple coding website. I have taught a lesson on it in the past for my coding unit but it also has tutorials of many different projects students can make. The site is also very easy to use and understand. 

3. Is this a tool that will not be blocked by the school filter?

I have been in some school districts where the online filter is pretty lenient, my school district's filter is the opposite. I have been blocked from some education websites. It is important to check that the website works at school before creating a whole lesson using it just to find out that it is in fact blocked. Not that I have ever had that happen to me or anything.... If you're like me and many of my teacher friends you find yourself planning lessons in your pajamas on a Saturday morning with your cup of coffee in tow. Although it is a much more relaxing environment for lesson writing, your home internet filter is probably not very strict. This is why it is important to check the tool on the school internet browser before you spend precious time developing your lesson.