Tuesday, April 25, 2017

Assessments in the STEAM Classroom


Assessments, a term that I used to dread, especially when I would hear it as a student. As I have gained more information about assessments and moved past the typical paper-pencil tests, I have grown to love-okay maybe that is a strong word- cherish them. I'm not sure whether or not I have explained my background in education to you before, in case I haven't here you go. My undergraduate degree is in early childhood education with a 4-5 generalist endorsement. Therefore I am trained to be a general education teacher preschool-5th grade. Most of my classes taught me how to be a teacher to one, self-contained classroom of 20-30 students that I saw everyday, all year. All of my assessment classes also trained me, with a classroom described above in mind. So, when I ended up in a "specialist" position of teaching S.T.E.A.M. which means I see an average of 10 classes with 20-30 students a day, the idea of assessing over 900 students terrified me. As I am completing my second year of teaching S.T.E.A.M. I am still figuring out what style of assessment works best.

I agree with the statements of Amanda Ronan of Edudemic, who wrote in a blog post that the most important part of assessments is how they are used. Over the summer I took a course in assessments for my master's degree in art education. During the course I learned new techniques to build assessments and new ways to use them. After completing the class, I made my goal of the upcoming school year to increase meaningful assessments in my classroom. I evaluated the effectiveness of my SLO (Student Learning Objective) and edited the wording to eliminate confusion for my students. I also used various styles of questions, to help differentiate my assessment and meet the needs of all students. This was a much-needed evaluation, as a summative assessment like this, determines my effectiveness as a teacher. Well, at least in the eyes of the state.

An SLO is actually both formative and summative. At the beginning of the year, the original SLO is given to determine a baseline for each student. This data can be used to determine what the students already know and areas they have strengths. It is important to use formative data to develop lessons. If students are already masters in an area, yet you continue to teach the material, it is likely that students will no longer pay attention. This could increase behavior issues or distractions for struggling students, who need to learn the material. On the other-hand, moving on from material before the students fully understand it, can cause students to be discouraged in learning any lessons that build on that concept. Therefore, they would struggle in class. Although I am required to give an SLO test, the most common formative assessments I give are by observing and completing a check list. While observing, I can help students immediately if there are any misconceptions, whereas it takes me a day to go through a test. After I do get the opportunity to grade the test, I won't see that student again for a week. By then, the misconception is probably the students reality. That is why I believe observing, checklists and even classroom conversations are the most effective form of formative assessments in my classroom.


As for summative assessments, I feel that rubrics are the most effective. I give my students rubrics to evaluate their work before they turn their assignments in. This allows students to be in charge of their own learning. I will also give students worksheets that go along with their projects to help them get their ideas down on paper. It also gives me a physical sheet to evaluate the students knowledge. I also feel that it helps students stay organized, especially from week to week. I think it is important to look at summative assessments and evaluate whether or not the whole class understands the lesson, through a certain project. If they don't understand, I usually create a new project that touches the basic idea, but is in a different way. I continue the cycle by evaluating the assessments of that lesson and developing my next step again. I continue until I feel confident that the students have learned the concepts.

Overall, I think that it is important that we have formative and summative assessments just to inform our instruction as teachers. There is so much knowledge that can be obtained just through looking at how students have completed each assessment. What kinds of assessments are effective for you? Let me know through Twitter or a comment below.

Some tools I use for assessments:

An example rubric:


Saturday, April 22, 2017

How I Started Running My T.A.B. Classroom


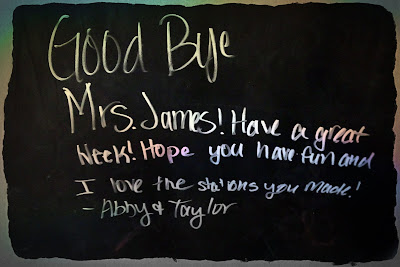
This week in S.T.E.A.M. I started taking the plunge into a choice-based classroom which helps Teach for Artistic Behaviors (T.A.B.). It has been such a rewarding experience. The picture to the left was a response from two of my students who "loved the stations I made". I found this on my whiteboard after their third grade class left, after experiencing stations for the first time. I used Pixlr to edit the whiteboard writing to be more interesting. To see more about Pixlr read my blog from yesterday, Cool Tool #5: Pixlr.


My lesson for my third grade students was to think about where fractions are represented in the real world. We listed several different options we thought of. As the students were sitting in the "lecture horseshoe" I explained what their required assignment was going to be. They are required to use the media of their choice to create a fraction in the real world. When they design their fraction it cannot be a shape that is divided into pieces it needs to show an actual object. Some examples were a chocolate bar, pie, pizza, etc. Third graders came up with some even more creative ideas, one of the many reasons I love young minds! 
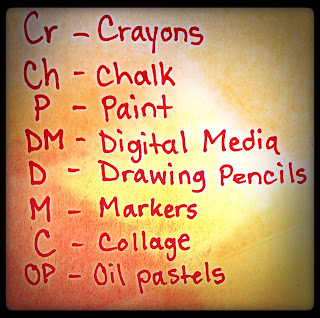
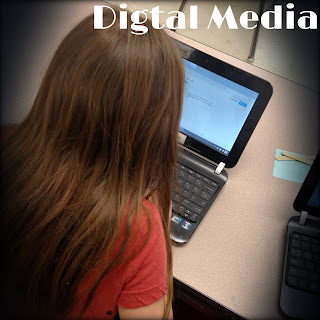
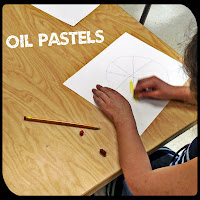
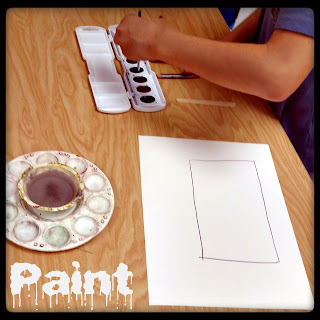
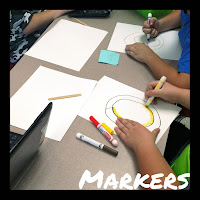
 After the lesson was explained I gave each student a Popsicle stick with their name and class code on it. I took this idea from Johanna Russell's T.A.B. classroom in the video I mentioned in my blog post, "Becoming The T.A.B. Classroom". After each student had their Popsicle stick I wrote out the eight stations that were available to them on post-it notes and stuck them on my "demonstration table" in the middle of the lecture horseshoe. The stations that I made available were: crayons, chalk, watercolor paint, digital media (Google Drawings), drawing pencils, markers, collage and oil pastels. Students would choose their station by placing their stick on top of a post-it note face down so no one could see their name. After all the students had chosen, I would rearrange sticks if there were more than five students in a group. if a student had to be moved from their first-choice station, I put a dot and the date on the back of their stick, so that the next time they chose, they would automatically get their first choice. One thing I learned, but forgot to say in my first class was to tell students that once they put their stick in a station, it must stay there. It got a little chaotic without that requirement.
I don't have any completed work yet, unfortunately. After explaining the process and lesson to my students, we only had about five minutes of work time left. I'm looking forward to the weeks to come, as what they have started looks pretty cool. When students left I had two cups for them to put their sticks into. The cups were "I'm finished" and "I need more time". All of my students put their sticks into the "I need more time" cup.

 I really like the choice-based/T.A.B. classroom, so far. I am looking forward to continuing my growth with this setup, I can definitely see it benefiting the concepts of S.T.E.A.M. I hope to start out with it next year and see how a whole year of choices will turn out. I want to keep you informed and I will do the best I can with keeping you up-to-date.

Any thoughts, questions, or ideas are always welcome!


Friday, April 21, 2017

Cool Tool #5: Pixlr

Today I am going to review one of my favorite free photo editors, Pixlr. I have been using Pixlr on my phone for years. It has been my go-to photo editing app, for a very long time. Most of my Instagram posts have gone through Pixlr before being posted. If you look around my blog, you may also notice some pictures have been edited, this has also been done using Pixlr. The picture above was a screenshot of the Pixlr website that I edited with the program. I changed the color to the negative option, added an overlay for the different shapes and then gave it a background. All of that took me about five minutes to complete.

I have tried other photo editing apps in the past, but none of them have made me this happy. I love that Pixlr has a very simple user interface, yet has an endless amount of options to add creative flair to pictures.There are backgrounds, borders, overlays, stickers, text boxes, and so much more that you can add to enhance a picture.

When first arriving at Pixlr.com, you will see three different web app options. They are:


Pixlr O Matic. This web app is a very simplified version of Pixlr Express. There are three steps and you move from one to the next using the next arrows. This app would probably work best with younger elementary students. It gives a taste of editing without being overwhelming.


Pixlr Editor. This web app is the most advanced of the three Pixlr web apps. It would be best suited for high school students or students who are skilled in Photoshop, when editing a picture. A way to use Pixlr Editor in an elementary classroom to start with a new image, which is a white page, and use the sketchy tool to free draw. With my T.A.B. transition, I have introduced a digital media center. In this center, we have been experimenting with Google Drawings. After researching Pixlr Editor, I think that it is easier to draw with, than Google Drawings. I also like that it looks more like an actual drawing than a digital one. There are also so many more authentic drawing options available than in Google Drawings.

Here's an example of a rose I drew, using multiple tools:

The final web app I am going to tell you about is Pixlr Express.

I am most familiar with this app. It is the same on an android device, as it is on the web app. It is very simple to use and like I mentioned above provides many different photo editing options. I think this app is great to make memes or posters for the classroom, if you are a teacher. Using Pixlr Express with students would be easily done. I think most students especially third grade and older would be able to understand the app's features. I can see this being a great way to encourage students to use creativity when they are creating presentations by transforming simple pictures into masterpieces.

I can also see Pixlr Express working with Pixlr Editor or another drawing program. A lesson could be that students draw in the Pixlr Editor, but take their drawings to a whole new level by editing their picture to make it more interesting. For example, take my rose above and look how I edited it in Pixlr Express:


I think that all of the Pixlr Apps have a place in the classroom. It can be used to illustrate a story for English or it can be used as a creative outlet or extension in the art room. I'm sure there are many other subject areas and ways it can be used in your classroom. I highly recommend it! Let me know what you have made or if you have already used it in your classroom. Comment below or tweet me @STEAMJames!

Saturday, April 15, 2017

Let's Talk About Learning Spaces


If you haven't realized it yet, I love to try new things in my instruction and have a very unorthodox classroom. With that being said, my learning space is also very different from the ordinary classroom. Many of my colleagues are surprised to see how my students are working when they walk into my room during the day. Sometimes my students are sitting at tables, but that is on a very rare occasion, as you know from my "Dare to Un-chair" blog, I typically do not have chairs in my room. Most of the time when you walk in my room my students are either standing around the table, sprawled out on the floor or sitting somewhere else around the room. I have witnessed some interesting things happen in my classroom with the multiple learning spaces I have created.


Increased Engagement and Learning:

Ever since I have changed my room to no chairs, I have watched my students' work increase. Since the students are standing while I give lectures, I find that the students who usually fidget with things they are not supposed to be touching, are just moving their bodies instead. They are usually looking at me and listening while they are doing this. I have also noticed that their work quality has increased and their creativity has also made a significant jump as compared to my previous classroom setup. I don't know if it is the increase of blood flow to their brain or just the ability to get comfortable that has made these changes occur.

With my new TAB setup, the children loved the change. It seems that every time I change my room, the students get excited about it and seem to be on task for a longer period of time. With all the stations spreading my students all over the room, behavior issues have gone down. Students are no longer crammed into one uncomfortable learning space, instead they can go to a place of their choice and one that is comfortable for them. When students choose what they want to do, they are more likely to stay engaged with the activity longer.


Google Apps for Education and Learning Spaces:

I love Google Apps for Education. I am constantly using them with my upper elementary students and sometimes with my younger elementary students. One of my favorites is Google Classroom. When I start lessons with apps, I have my students go to my Google Classroom first, to get their assignment. With students scattered all over my room, having assignments in Google Classroom is so much more effective, than my old style of teaching. My old style was to write the assignment on the white board and have students at their seat working. When students are under tables, sprawled out on the floor or sitting at a station that has their back to the board, teaching this way is no longer logical. When a student goes into Google Classroom, they are able to see the assignment from the comfort of their new seat. I also like that an absent student can easily access what they have missed.

I have started to incorporate a digital media station in my TAB Classroom setup. With this in mind I have been teaching more Google Apps and other creative education apps, to my students. I want my students to know how to use the apps correctly before I set them free to use them on their own.

Take the risk:

I think sometimes as teachers we get stuck doing what is comfortable or easy, instead of taking risks. I know that many of my colleagues are intimidated by the noise and what looks to be chaos in my room. From an "outside-looking-in" perspective, I'm sure it looks pretty crazy. What I know, though, is that every one of my students is working and doing so in a way that best suites their needs.

Have you already taken the risk or do you have suggestions on other learning spaces? Let me know!

Saturday, April 8, 2017

The TAB Transformation: A Long Work in Progress.


Transforming my room into a TAB classroom has been a lot of work. I am very grateful that I have had a couple diligent 5th graders who come in twice a week to help me make posters for each center and organize materials. This past week I have been setting up for my STEAM Showcase, which is an art show for my third through fifth graders at both elementary schools. It is also a lot of work, so a lot of my TAB creation has been done by my fifth graders.

I did introduce some choice-based lessons to my kindergarten and first grade students, this week. The students loved the idea of being in charge of what materials they used to complete their assignment. The assignment I chose to experiment with was an extension to the book, "The Day The Crayons Quit" by Drew Daywalt. If you have never read that book it is a hilarious story told by crayons about their complaints of how their owner uses them. It is a great character building story and perfect for an art room.

My students are hard at work while choosing where to sit and which material to use.

Back to my lesson. After we read the book, I had the first students write letters to the crayons to convince them to come back and to draw a picture showing why they needed that color. I allowed my students to choose from the following art supplies: crayons, colored pencils and markers. For my kindergartners, I had them draw a picture of a crayon but they had to practice their 3-dimensional shape drawing skills. They also had to give the crayon a people-like expression and some clothes. I gave the kindergartners the same material choices. Overall I found the choice-based lesson to be beneficial. In my next post I am going to talk about flexible seating and the classroom environment. The way the choices worked, students got comfortable and were sprawled all over the room. It limited behavior issues and allowed students to perform in a comfortable environment.

I think with this small taste of TAB/choice-based curriculum, it is just leaving me hungry for more. I am looking forward to when I can jump into my new TAB curriculum, full-forced.

If you have any suggestions or would like to know the other ways I used "The Day the Crayons Quit" please contact me through Twitter or the comment section below!

Cool Tool #4: Seesaw


The cool tool I chose this week is Seesaw. I started Seesaw with the thought that it was an eBook creator for elementary students. What I learned was that it is much more than that. Seesaw is a great app that allows students to share their ideas but also read and comment on the ideas of others. There are six different choices to express yourself.

Students and the teacher can post photos either from the computer or take one directly with the webcam. At my school we mostly use netbooks and Chromebooks, so having saved pictures on the computer is difficult. Having the option to use the webcam is a definite pro for this app. Along with the option to take a picture with the website, you can also record a video using the website, as well. I think this option would be great to introduce new lessons or to promote a flipped classroom. You can also import previously recorded videos too. If you want to important a video from a website you will have to go to the add link option. 

The drawing option is really neat. There are many different colors to choose from and it does a pretty job of understanding where you want things drawn. Some drawing programs like Google Draw, the mouse has a difficult time communicating with program, which makes drawing in the app inaccurate. 

I also like that the drawing app has the option to add text too. There are a couple different options for the writing. It can have different fonts and backgrounds to make the drawings even more interesting. this would be a good tool to use to create a cover for a story. 

I used this cool tool with my after school tutoring third and fifth graders. We decided to create adventure stories and share them in Seesaw. Below is the cover I posted to my students as an example. 

Another option for sharing content on Seesaw is the note option. This is where I had my students write the content of their story. After you publish the note, you cannot edit it. This is frustrating, as a very beneficial part of eBooks is the ability to continuously edit it. This is a con of the tool, unfortunately. I do like it as a brainstorming process, though. My students liked that once they posted a note and the teacher improved it, they could read other students' notes as well. I had students from two different buildings  in the same classroom on the tool. Both sets of students were actively engaged in reading and commenting on others' stories. It was really cool to see their peer reviews and support they left for each other. Here are some of my students' stories:
Above is by a 4th grade girl, who's name is left off for her privacy. 
Above is by a 4th grade boy, who's name is left off for privacy. 

The above picture is by a 5th grade girl. 
My students really enjoyed this cool tool. They have been asking me everyday since I introduced it to them, if they could get on it. I have also noticed that some of them got on it at home or in their free time. I think it is important that students are excited about writing, because when you are excited about something you usually do it more often. Writing is something that improves with practice. I also am a huge advocate for creativity, which this tool definitely offers. I can see its value in other subjects as well. I would like to use it in my STEAM classroom, in the future. 

Have you ever used Seesaw? What do you think about it? How did you use it? Let me know in the comments below.